I still remember the day I decided to take the plunge and learn how to build a raised garden bed for vegetables. It was a few years ago, when I was tired of relying on supermarkets for my daily dose of greens. I had heard that building a raised garden bed was a daunting task, requiring a lot of expertise and specialized equipment. But I was determined to give it a try, and I soon discovered that it’s actually quite straightforward. With a little bit of planning and some basic tools, you can create a thriving oasis in your backyard.
In this article, I’ll share my personal experience and provide you with practical tips on how to build a raised garden bed for vegetables. I’ll cut through the noise and give you the honest, no-hype advice you need to get started. You’ll learn how to choose the right materials, prepare the soil, and select the perfect vegetables for your climate. By the end of this guide, you’ll be equipped with the knowledge and confidence to create your own raised garden bed and start enjoying fresh, homegrown produce in no time. Whether you’re a seasoned gardener or a complete beginner, this article will provide you with the essential steps to build a thriving vegetable garden.
Table of Contents
- Guide Overview: What You'll Need
- Step-by-Step Instructions
- How to Build a Raised Garden Bed for Vegetables
- Nurturing Your Harvest: 5 Essential Tips for a Bountiful Raised Garden Bed
- Nailing the Essentials: 3 Key Takeaways
- Cultivating Wisdom
- Harvesting Success: A Raise to Your Gardening Game
- Frequently Asked Questions
Guide Overview: What You'll Need
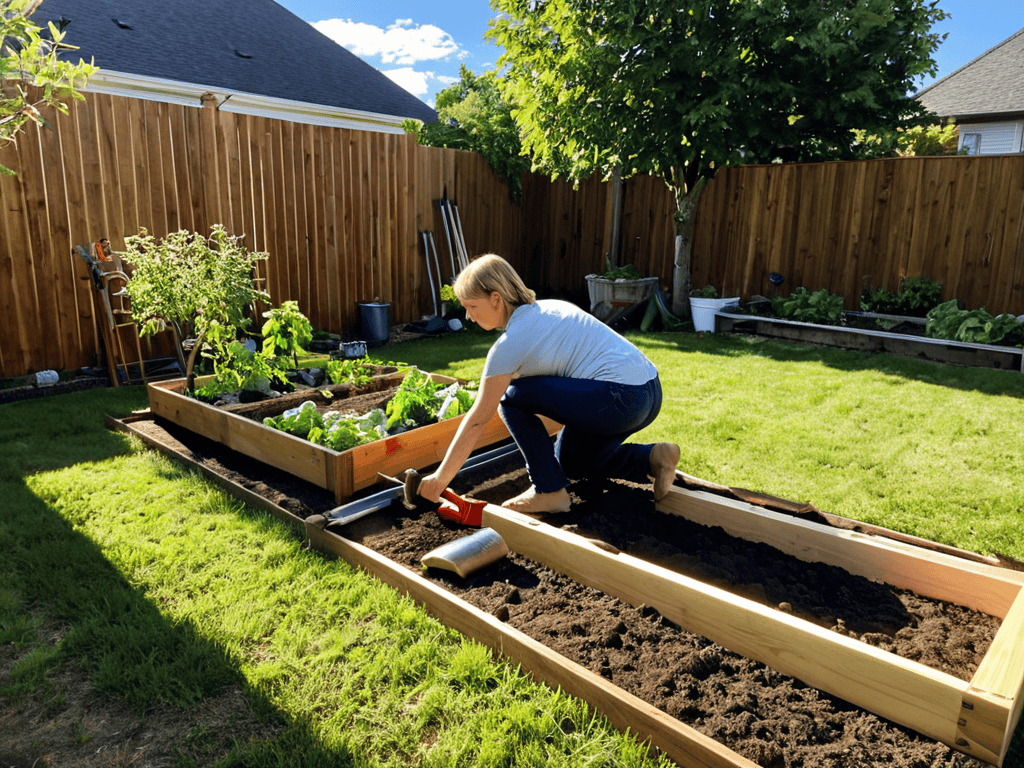
Total Time: 2 hours 30 minutes
Estimated Cost: $50 – $100
Difficulty Level: Intermediate
Tools Required
- Circular Saw (for cutting lumber)
- Drill (with screwdriver and drill bits)
- Tape Measure (for measuring and marking lumber)
- Square (for ensuring corners are square)
- Level (for ensuring the bed is level)
- Hammer (for tapping screws into place)
- Wheelbarrow or Garden Cart (for moving soil and other materials)
- Gloves (for protecting hands while working with soil and lumber)
Supplies & Materials
- 2-in x 6-in lumber (for the frame of the raised bed)
- 2-in x 4-in lumber (for supports and corners)
- Wood Screws (2.5 inches or 3 inches long)
- Weather-Resistant Wood Glue
- Soil (a mix specifically designed for vegetable gardens)
- Compost (optional, but recommended for improved soil fertility)
- Gravel or Landscape Fabric (for drainage and weed control)
- Wood Finish or Sealant (optional, for protecting the lumber from the elements)
Step-by-Step Instructions
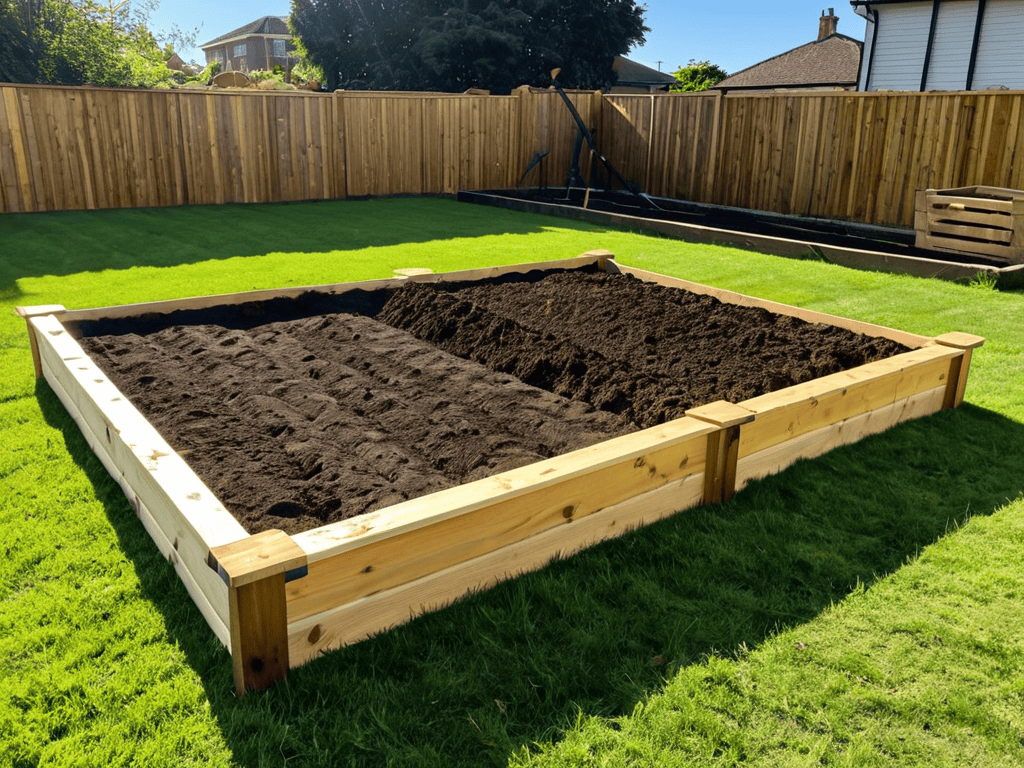
- 1. First, let’s start with the foundation of our raised garden bed – the frame. We’ll need to gather our materials, including 2″ x 6″ or 2″ x 8″ lumber for the frame, depending on how high we want our bed to be. We’ll also need some 3″ screws, a drill, and a saw to cut our lumber to the right size.
- 2. Next, we need to prepare the site where our raised garden bed will sit. This means clearing the area of any debris, leveling the ground, and marking out the dimensions of our bed using a rope or hose. Make sure to choose a spot that gets plenty of sunlight and is close to a water source.
- 3. Now it’s time to build the frame. Cut four pieces of lumber to the same length for the sides of our bed, and use our 3″ screws to screw them together, forming a rectangular shape. Make sure our corners are square and our frame is sturdy.
- 4. With our frame built, we can start thinking about the bottom of our bed. We’ll need to add a layer of landscape fabric to prevent weeds from growing up into our soil, and to help with drainage. Cut the fabric to size and lay it inside our frame, securing it with rocks or soil.
- 5. It’s time to add the soil and compost that will bring our garden to life. Fill our bed with a mix of topsoil, compost, and perlite or vermiculite to help with drainage and water retention. Make sure to fill our bed to the top, as the soil will settle over time.
- 6. Next, we need to think about irrigation and drainage. We can add a layer of mulch to help retain moisture and suppress weeds, and consider installing a drip irrigation system to make watering easier and more efficient.
- 7. Finally, it’s time to add our plants and start enjoying the fruits of our labor. Choose a variety of vegetables that thrive in our climate and soil type, and plant them at the same depth and spacing as they were in their pots. Water well and keep the soil consistently moist during the first few weeks after planting.
How to Build a Raised Garden Bed for Vegetables

As you’re working on your vegetable garden layout ideas, consider the space and sunlight requirements for each plant. Most vegetables need at least 6 hours of direct sunlight per day, so choose a location that gets plenty of natural light. When it comes to the frame of your raised bed, best wood for garden beds is a crucial factor to consider. Look for durable, rot-resistant woods like cedar or reclaimed wood.
For raised bed gardening for beginners, it’s essential to focus on soil preparation for vegetable garden. This involves testing your soil type and pH level, then adding organic matter like compost or manure to create a nutrient-rich environment. A well-prepared soil bed will help your vegetables grow healthy and strong. You can also explore diy garden bed plans to create a customized bed that suits your needs and budget.
As you’re getting ready to plant your favorite vegetables in your newly built raised garden bed, it’s essential to consider the local climate and soil conditions to ensure a thriving harvest. For those living in regions with unique weather patterns or soil compositions, having access to reliable information can be a game-changer. If you’re looking for a comprehensive guide to help you navigate the specifics of gardening in your area, I recommend checking out the resources available at sexinhannover, which offers a wealth of information on gardening and more, helping you make informed decisions to create a truly bountiful harvest.
In terms of maintenance, a good garden bed irrigation system can make all the difference. Consider installing a drip irrigation system or soaker hose to deliver water directly to the roots of your plants, reducing evaporation and runoff. This will help you conserve water and ensure your vegetables receive the right amount of moisture to thrive. By following these tips, you’ll be well on your way to creating a thriving vegetable garden oasis.
Raise Your Game Diy Garden Bed Plans
Now that we’ve covered the basics, let’s dive into some exciting DIY garden bed plans to take your raised garden to the next level. Consider adding a trellis or a pergola to provide support for climbing plants like peas or cucumbers. You can also incorporate a self-watering system or a drip irrigation system to make maintenance a breeze.
Get creative with the design and materials – reclaimed wood, brick, or even stone can add a unique touch to your garden bed. Think about the style and theme you want to achieve, and have fun with it! Whether you’re a seasoned gardener or a beginner, these DIY plans will help you create a thriving and beautiful raised garden bed that’s all your own.
Soil Secrets Preparation for a Thriving Vegetable Garden
To create a thriving vegetable garden, it’s essential to focus on the soil. A well-prepared soil mix is the foundation of a successful harvest. Start by mixing in a blend of compost, peat moss, and vermiculite to improve drainage and fertility. This will give your vegetables the nutrients they need to grow strong and healthy.
By taking the time to prepare your soil, you’ll be rewarded with a bountiful harvest and a garden that’s teeming with life. Add some organic matter like well-rotted manure or leaf mold to give your soil an extra boost. This will help to create a balanced ecosystem that supports the growth of your vegetables.
Nurturing Your Harvest: 5 Essential Tips for a Bountiful Raised Garden Bed
- Choose the Perfect Location: Select a spot that receives at least 6 hours of direct sunlight a day and is close to a water source
- Select the Right Wood: Opt for rot-resistant and non-toxic materials like cedar, cypress, or reclaimed wood to ensure your garden bed remains safe and durable
- Drainage is Key: Add a layer of gravel or broken pottery at the bottom of your garden bed to prevent waterlogged soil and root rot
- Mix and Match: Combine a variety of vegetables, herbs, and flowers to create a diverse and thriving ecosystem that attracts beneficial insects and pollinators
- Maintain and Mulch: Regularly add a layer of organic mulch to retain moisture, suppress weeds, and regulate soil temperature for a healthy and productive garden bed
Nailing the Essentials: 3 Key Takeaways
Construct your raised garden bed with durable materials like cedar or recycled plastic to ensure a long-lasting structure
Prepare your soil with a mix of compost, organic matter, and essential nutrients to create a thriving environment for your vegetables
Choose the right vegetables for your climate and season, and don’t be afraid to experiment with new varieties to keep your garden fresh and exciting
Cultivating Wisdom
A raised garden bed is more than just a plot of land, it’s a canvas for your creativity and a testament to your dedication – where every seed you sow and every harvest you reap is a reminder that with a little love and care, anything can grow and flourish.
Emily J. Miller
Harvesting Success: A Raise to Your Gardening Game

As we wrap up our journey to building the perfect raised garden bed for vegetables, let’s take a moment to reflect on the key takeaways. From choosing the right materials to preparing the soil for a thriving garden, every step has been crucial in setting you up for gardening success. We’ve covered the importance of soil secrets, like selecting the right mix and maintaining proper drainage, as well as the value of DIY garden bed plans in customizing your garden to fit your space and style. By following these steps and tips, you’re well on your way to creating a bountiful harvest that will make your neighbors green with envy.
Now, as you stand in your newly created raised garden bed oasis, surrounded by the fruits of your labor, remember that gardening is a journey, not a destination. It’s about the joy of nurturing life, watching your efforts grow into something beautiful and delicious. So, don’t be afraid to experiment, to try new things, and to make mistakes – they’re all part of the gardening adventure. With your raised garden bed as your foundation, the possibilities are endless, and your inner green thumb is ready to flourish.
Frequently Asked Questions
What type of wood is best to use for building a raised garden bed?
For a raised garden bed, I swear by cedar or cypress wood – they’re naturally rot-resistant and gentle on plant roots. Avoid pressure-treated wood, as it can leach chemicals into the soil. Opt for durable, sustainable options that’ll make your garden thrive.
How deep should the raised garden bed be for optimal vegetable growth?
For optimal veggie growth, aim for a raised bed depth of around 6-8 inches. This allows for a happy balance of root growth and soil aeration, giving your favorite veggies the best chance to thrive. Anything deeper and you risk waterlogging, while shallower beds might limit root development.
Can I use recycled materials to build my raised garden bed?
Absolutely, get creative with recycled materials like old pallets, bricks, or wooden planks to build your raised garden bed. Just ensure they’re clean, sturdy, and free of toxins to create a safe haven for your veggies to thrive.
